Beer Braised Sausage On Sweet & Spicy Warm Slaw

guiness beer braised sausage

Beer Braised Sausage On Sweet & Spicy Warm Slaw

This yummy beer braised sausage recipe offers taste of summer year round!  Guiness beer. Sausage. Peppers. Those are just a few of the ingredients that make this dish a stand out!  That Guiness beer also makes it just perfect to serve as a St. Patrick’s Day meal!

For this recipe you won’t need your grill, so if it is stored for the winter .. not a problem.  This sausage is braised and slow cooked in beer and served over a slaw.  No, not cole slaw – that would be for summer.  We are talking about a warm slaw with a kick.  Sweet & spicy to keep you warm this winter.  The recipe is easy to adjust the spice level just in case you are not a fan of spicy.

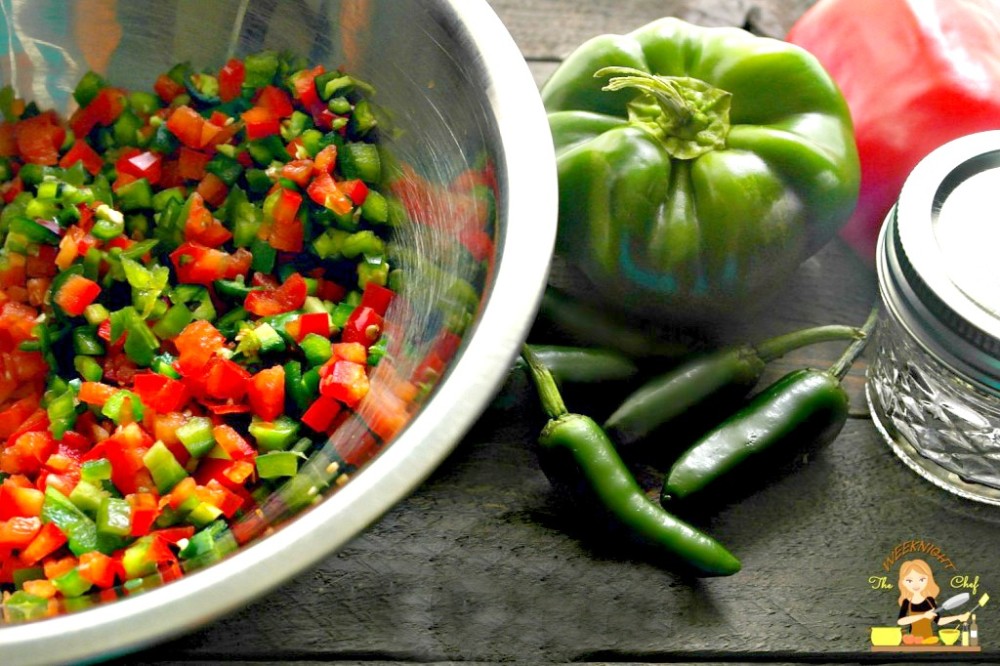
Just look at all this color !  Fresh, crunchy, flavorful.  It won’t be long before this is a new favorite in your household.

Beer Braised Sausage On Sweet & Spicy Warm Slaw

Ingredients
  1. 1 bottle Guiness Beer
  2. Sausage of your choice (we used a German Cheddar Sausage)
  3. 1 tablespoon dijon mustard
  4. Salt & Pepper
For the slaw
  1. 1 cup shredded cabbage
  2. 2 large carrots, shredded
  3. 1 red pepper, sliced thin
  4. 1 tablespoon apple cider vinegar
  5. 1 tablespoon white sugar
  6. 1/2 teaspoon minced garlic
  7. 1/2 teaspoon red pepper flakes (optional)
  8. 1 teaspoon olive oil
  9. Salt & Pepper
For the sausage
  1. In a skillet on medium high heat, drizzle olive oil and add sausages. Brown on each side (about 1 minute)
  2. Add the beer, mustard and a pinch of salt & pepper.
  3. Bring to a boil, reduce to simmer.
  4. Cook for 15 minutes covered and an additional 10 minutes without the cover.
  5. Remove the sausages from the pan and set aside.
For the cabbage
  1. In the same skillet, over medium heat drizzle olive oil and add vegetables
  2. Mix in the vinegar, sugar, garlic and seasonings.
  3. Saute for about 10 minutes, add sausage back to the pan on top of the slaw.
  4. Heat through together covered until sausage is warmed again.
  5. Serve hot with a drizzle of dijon mustard!

Guiness Braised Sausage On Sweet & Spicy Warm Slaw

10 All Star Juicy & Cheesy Burger Recipes

burgers-with-title 

10 All Star Juicy & Cheesy Burger Recipes

There is only one time of year for burgers…   ALL YEAR!   I personally never put my grill away, no matter how much snow.  We keep it covered and close on the deck.  One trick I learned that works amazing for burgers indoors,  is to sear it on high heat real fast (about 1 minute each side)  and then finish them in the oven on about 400 for 10 minutes.  If you are stuck inside for the winter and want a taste of summer,  try one of these great burgers! 

Pimento Cheese Stuffed Merlot Burgers | Yours and Mine are Ours

Peppercorn Pileup Burger | A Family Feast

Barbeque Bacon Cheeseburgers | Tastes of Lizzy T’s

South of the Border Turkey Burger | Flour on my Face

Gnarly Mexican Burger | The Crumby Cupcake

Copycat Red Robin Bonzai Burger | A Mom’s Take

French Onion Beer Burgers | Snappy Gourmet

Jalapeno Jack Burger with Picante Mayo | Cincy Shopper

Asian BBQ Burger with Sriracha Mayo | Flavor Mosaic

Turkey Burgers with Lemon Dill Yogurt | Hot Eats & Cool Reads


Southwestern Style Cornbread Recipe with Ham and Cheddar

Disclosure Affiliate

Southwestern Style Cornbread Recipe with Ham and Cheddar

This recipe will make the perfect side or main dish! It’s a great way to use up any leftover ham (or if you don’t have leftover, you can buy a piece from the deli.) If you have a favorite homemade cornbread recipe feel free to use it. In the interest of time, I used a boxed mix.  Jiffy Cornbread Mix is our go-to!

This recipe will feed a lot of people, so try taking this to your next dinner with friends or a family potluck. A 13×9 pan serves about 12-15 people.

Southwestern Style Cornbread

Ingredients
  1. 3 boxes of Jiffy Cornbread Mix prepared
  2. 1 cup of diced ham ( use leftover or you can purchase a 1/4 inch thick piece from the deli)
  3. 1 cup shredded cheddar, pepper jack or your favorite cheese
  4. 1 jalapeno – fine dice
  5. 1/4 small onion- fine dice
  6. 1 small tomato- chopped
  7. 1 ear of corn- peel and remove corn from cob
  8. salt/pepper to taste
  9. 1 tablespoon olive oil
Instructions
  1. Preheat the oven according to the package instructions
  2. Grease a 13×9 pan with butter
  3. Saute (in olive oil) the ham and veggies until tender ( only about 2-3 minutes for added flavor)
  4. Add the ham, veggies, shredded cheese to the prepared cornbread batter, mix well
  5. Pour evenly into pan
  6. Bake according to package instructions.
  7. Serve warm OR cooled!

SWCornbreadPIN


Easiest Hot Pepper Jam Recipe For Beginner Canning


pepper jam recipe

 Easiest Hot Pepper Jam Recipe For Beginner Canning

(this recipe can be modified to omit the heat, just skip the jalapenos)

Tis’ the season for canning!  Right about now your garden is probably giving you a harvest every day. If you don’t have a plan for cooking or preserving these veggies, they can add up fast! A great way to use them is canning!

Canning can be intimidating if you have never done it or are just beginning.  One thing to remember is that you have to follow every recipe and process exactly. No cutting corners, it is important to ensure food safety.

The good thing…. You won’t need to go out and spend $100 on new canning equipment. As long as you have a pot that is deep enough to cover the tops of your jars with water, you are good to go.  I recommend a Ball Canning Basket (pictured below) or a rack for inside your pot.  I use the basket, it is easy, just load it and drop in the water.  No tongs required to take it out.

EASIEST HOT PEPPER JAM RECIPE Preparation

TIP *    Make the canning process smoother by staying organized and clean!  Stay on track, put away anything you are finished with and clean up as you go.

What you need:  It may look like a lot, but it isn’t.

  • 2qt pot & a larger stock pot
  • mixing spoon
  • measuring cup/s
  • strainer
  • ladle
  • 4oz jam jars , lids, bands
  • bowl
  • knife
  • Anything else pictured here (yes this is my pile of clean dishes after I was done!)  :


EASIEST HOT PEPPER JAM RECIPE Supplies

Ingredients:

  • 1 small green bell pepper
  • 1/2 red bell pepper
  • 6 jalapeno peppers
  • 1 – 3oz. packet of Liquid Pectin
  • 1 1/2 cup apple juice
  • 1 cup white vinegar
  • 4 cups white sugar

HOT PEPPERS

What to do:

Place all jars, lids and bands in a clean sink full of straight hot water. Let stand at least 5 mins. to sterilize. Place on a towel to air dry while you work.

EASIEST HOT PEPPER JAM RECIPE Jars

Very finely chop the peppers. Bring the apple juice, vinegar and peppers to a boil, reduce to low and simmer for 10 mins.  Strain the juice from the mixture. Reserve the peppers if you wish to have them in the jam, if not then discard.

EASIEST HOT PEPPER JAM Straining

Rinse the sauce pan of any leftover peppers,  add the liquid mixture (2 cups worth) back into the sauce pan. Bring it to a boil while adding the sugar one cup at a time. Mix constantly.

Bring to a rolling boil. As soon as it is boiling, remove from heat, quickly stir in the pectin. Add back to the heat and boil for 1 minute.   Remove from heat. DO NOT OVER BOIL.  Jam will be “gummy”.

EASIEST HOT PEPPER Jelly

If you want the peppers ,  add them in now.  Then ladle into jars.  Leave about 1/4 inch of what is called “head space” (space between the top of the food product and the top of the jar).

Using a clean cloth, wipe the rims of the jars.  Add the lids and bands. Do not over tighten the bands, you want air bubbles to escape, hand tighten down just until snug.

Bring a large pot of water to a rolling boil.  Process jars for 5mins.  Make sure the water completely covers the jars.

Remove and let sit for 24hrs.

Canning Hot Water Bath

NOTES: 

1. You will hear a “pop” from the jars, this is normal.

2. After 24hrs,  any jar with a lid that flexes when you push down on the middle needs to be refrigerated and consumed within 2 weeks.  This means it did not properly seal.

3. I chose to purchase these 4 0z. jars,  they were ($9 for 12), you can also use 8 0z. jam jars.  This recipe made 9- 4oz. jars.

Serve with crackers, or spread over cream cheese on a bagel!

Hot Pepper Jelly

HOT PEPPER JELLY JARS


How To Steam or Boil Lobster Perfectly Plus Other Tips

How To Steam or Boil Lobster Perfectly Plus Other Tips

How To Steam or Boil Lobster Perfectly Plus Other Tips

Summer in Maine (or actually any time of year) means Lobster. All things lobster.  Lobsters boiled, steamed, lazy, fried, in a roll , you name it.  If you are a fan of lobster you may know it is one of those things that makes most people second guess themselves every single time before cooking.  The first question is usually should I steam or boil? Then, for how long? I have cooked my share of lobster and still question it each time.  The last thing anyone wants is an over cooked lobster. They are way too expensive for that! 

How To Steam or Boil Lobster Perfectly Plus Other Tips 2

My favorite way to cook a lobster is to boil it. Usually I am preparing a lobster bake and will have potatoes, corn, clams and other goodies for the pot. To boil the perfect lobster every time, simple follow these instructions courtesy of LobsterfromMaine.com:

Boiling Instructions:
Choose a pot large enough to hold all the lobsters comfortably; do not crowd them. A 4- to 5-gallon pot can handle 6 to 8 pounds of lobster. Fill with water, allowing 3 quarts of water per 1-1/2 to 2 pounds of lobster. Add sea salt (to taste) to water. Bring the water to a rolling boil. Add the live lobsters one at a time, and start timing immediately. Do not cover. Stir the lobsters halfway through cooking. Let the lobsters rest for 5 minutes or so after cooking to allow the meat to absorb some of the moisture in the shell.
For timing, use the weight of individual lobsters, not total weight of all lobsters being cooked.

If the lobster weighs: Boil:
1 pound 8 minutes
1 1/4 pounds 9-10 minutes
1 1/2 pounds 11-12 minutes
1 3/4 pounds 12-13 minutes
2 pounds 15 minutes
2 1/2 pounds 20 minutes
3 pounds 25 minutes
5 pounds 35-40 minutes

If you prefer to steam your lobster :   Steaming Instructions 


Garlic Parmesan Pull A Part Bread With Spinach Artichoke Dip


SAMSUNG CSC

Garlic Parmesan Pull A Part Bread With Spinach Artichoke Dip

A creative way to make traditional artichoke dip, this recipe adds garlic Parmesan pull -a- part bread instead of baking it in a dish by itself.  It looks great, tastes great and well, is something different so why not?   The best part is how easy this is to make. A recipe doesn’t have to be complicated to be delicious or sophisticated.   Some of my best dishes have been semi-homemade, contain few ingredients and take about 30 minutes start to finish.  

This recipe uses pizza dough instead of making a homemade bread and dealing with yeast. Pizza dough can be pretty versatile if treated the right way.  I use it for a lot of different things.  

Perfect for parties, pot lucks or even a light dinner! 

What you need: 

  • 1/2 can of Artichokes- chopped
  • 1  Cup of chopped spinach 
  • 3 tablespoons of mayonnaise 
  • 1/4 Cup Parmesan cheese 
  • 1/4 Cup shredded mozzarella cheese 
  • Pinch of salt & pepper 
  • Olive Oil
  • One pizza dough ( frozen or make your own from those handy “just ad water” 50¢ packages Walmart sells)
  • 1 teaspoon Garlic – either fresh (minced) , powder or chopped (dried)  
  • Oven safe skillet or dish 

Garlic Parmesan Pull A Part Bread With Spinach Artichoke Dip

What to do:

Preheat the oven to 425°. In a small bowl combine the spinach, artichoke, mayonnaise, Parmesan, mozzarella, salt & pepper.  Set aside.

SAMSUNG CSC

Separate your pizza dough into 3 even pieces. Roll each piece into a long “rope” just as your kiddo would with play doh.. rolling from the middle stretching outward until about 1 inch thick.  

Garlic Parmesan Pull A Part Bread With Spinach Artichoke Dip


Lay the pieces side by side, carefully pinch the ends together and literally braid the pieces. Do not press together, just lay them one over the other.  If you don’t know how to braid you can twist them! 

SAMSUNG CSC


Grease an oven safe skillet or dish with Olive Oil.  Place the braid around the edge in a circle.  Fill with the spinach artichoke mixture.  Pile it right up.  The dip will cook down and the dough will rise.

Garlic Parmesan Pull A Part Bread With Spinach Artichoke Dip

Brush the dough with Olive Oil, sprinkle with sea salt and the garlic. Bake on 425°  for about 20 minutes or until bread is golden brown. 

Serve warm, pull apart the bread and scoop up the dip!  

Garlic Parmesan Pull A Part Bread With Spinach Artichoke Dip


Garlic Parmesan Pull-Apart  Bread with Spinach Artichoke Dip Recipe

Easy 15 Minute Homemade Deep Dish Pizza

Easy 15 Minute Homemade Deep Dish Pizza

Easy 15 Minute Homemade Deep Dish Pizza

This pizza will make you throw away your take out menu and get you in the kitchen for sure! It is so simple and so inexpensive that even Pizza Hut’s $10 any pizza won’t entice you anymore. Finally a homemade pizza that actually does compare to the restaurants.

What you need: 

  • 1 package of pizza dough mix (Walmart- 52¢!! why have I not tried this stuff way before now?)
  • 1/2 cup hot water
  • 1 – 9-10 inch pie plate, cake pan or oven safe skillet
  • Olive oil
  • Butter
  • Desired toppings
  • *Sauce tip-  so when I decided to make these, I realized I had literally no sauce. Not even pasta sauce. I was bumming. Until I saw a can of Italian style diced tomatoes.  OK! Open it up, dump it into the blender, add a little olive oil, pinch of salt & pepper, a little garlic powder (or fresh). Blend. Done.   Hubby said I need to make the sauce like that from now on.  It was FANTASTIC.

What to do: 

Preheat the oven to 425°

In a medium bowl, mix the hot water with the package of pizza dough mix. Work it until a soft dough ball.  Let sit and rest for about 5 mins.

Grease your desired pan or dish with butter then drizzle with olive oil (not necessary if you don’t have it, fine)

Easy 15 Minute Homemade Deep Dish Pizza

Press the dough into the dish. Bring it slightly up the sides.

Spread the sauce, cheese and toppings.  Bake for about 15-20mins.  or until golden brown edges appear.

*CHEESE TIP-  Sprinkle cheese heavier around the edges, when cheese melts on a pizza it gradually makes it’s way to the middle.  This way you won’t have edges with no cheese!

Easy 15 Minute Homemade Deep Dish Pizza

Want more pizza recipes? Check out this easy homemade pizza dough recipe and an easy homemade pizza sauce recipe!

EASY 15 MINUTE HOMEMADE DEEP DISH PIZZA

Hearty Avocado & Turkey Salad With Greek Dressing

Hearty Avocado & Turkey Salad With Greek Dressing

Hearty Avocado & Turkey Salad With Greek Dressing

Salads are easy, anyone can make them.  But they can also be boring and leave you craving something more hearty.  Not this salad!  This avocado and turkey salad skips the lettuce and gives you a protein filled meal that will leave you feeling full and satisfied. 

What you need:

  • Your favorite glass or bowl
  • 1/2 avocado, diced
  • 1/2 Cup turkey , diced (if you do not have fresh turkey head over to the deli and ask for a thick slice or your favorite kind)
  • small handful of fresh baby spinach
  • 1 Can of whole beets, drained and diced
  • A few green or red grapes, halved 

For the Greek dressing:

  • 1 Cup of plain Greek yogurt
  • 1/4 tsp each salt & pepper
  • 1/4 tsp garlic powder
  • 1/4 tsp each dried basil & oregano
  • 1 teaspoon of lemon juice
  • 1 teaspoon honey
  • 1 teaspoon Dijon mustard (optional)

What to do: 

With your ingredients diced into bite sized pieces, simply layer them into your dish, glass or bowl.  Starting with the beets.  Add any additional ingredients you desire. 

For the dressing-  whisk  all the ingredients into the yogurt. Pour desired amount over salad. 

For added flavor and flare- 

Try sauteing the turkey in a little olive oil to give it a nice, warm smokey flavor! 

Hearty Avocado & Turkey Salad with Greek Dressing Recipe

Stuffed Chicken Breast With Homemade Gravy in 30 Minutes

 Stuffed Chicken Breast With Homemade Gravy in 30 Minutes

Stuffed Chicken Breast With Homemade Gravy in 30 Minutes

Craving a hearty, warm you up kind of meal on a cool , drab day? This is the perfect recipe.  Add some mashed potato and you will be on your way to a comfort food coma! 

What you need: 

What to do:

Using the technique shown in the video below, butterfly each chicken breast.  


Fill with prepared stuffing, be careful not to over stuff you want the chicken to fold closed easily.

Drizzle with olive oil and sprinkle seasonings (optional) like garlic powder, salt & pepper, Italian blend 

Bake on 350º for about 30 minutes , cook times will vary, make sure your chicken is cooked thoroughly, stuffed meat tends to take longer. 

Cut in half diagonally, serve with gravy! 

Stuffed Chicken Breast with Homemade Gravy in Under 30 Minutes

For the gravy: 

Packet method- Well, the quickest and easiest way to make your gravy may not be considered homemade, but at least it doesn’t come from a can-   mix one chicken gravy packet into 1 cup of water, whisk well and microwave on High for 2 minutes. This will bring the liquid to a boil.  Mix, then let sit.  Will thicken upon standing. 

Bouillon cube-  This is quick also, but I think it can be too salty. Usually I make my own gravy from pan drippings, this recipe just doesn’t create enough to do that.   Dissolve the cube into 1 cup of water, heat on High in the microwave for about 2 minutes.  Mix the flour into 1 tablespoon of water to create a slurry then add it to the chicken bouillon.  Mix well, heat on high for 1 minute, mix, then let sit.  Will thicken upon standing. 

Stuffed Chicken Breast With Homemade Gravy in 30 Minutes

Easy Restaurant Style Italian Chicken Meatballs

Easy Restaurant Style Italian Chicken Meatballs

Easy Restaurant Style Italian Chicken Meatballs

We recently went to eat at Olive Garden and tried their new chicken meatballs. I was impressed, I usually don’t care for chicken meatballs or sausage, I like my ground beef. I was surprised at the flavor AND the price…2 for $5.  Craziness. My first thought, of course, was I can make these just as good and at a fraction of the cost per serving. So the next day I grabbed some ground chicken ($3.58lb) a few other ingredients and made my own chicken meatballs. These came out amazing. I knew they would. Here is why…

Chicken has a really low fat content, so if you do not cook it just right it will turn out dry. To compensate for this I used mayonnaise in the recipe. It is commonly used to keep chicken moist. Win.win.  Even if you are a die hard fan of beef meatballs, give these a try. You will be surprised, I was!

What you need:

  • 1lb ground chicken
  • 1 large egg
  • 1 cup seasoned bread crumbs
  • 2 tablespoons of mayonnaise
  • 1/4 teaspoon of fresh, minced garlic (or 1/2 teaspoon garlic powder)
  • 1/2 teaspoon of Italian blend seasoning (or a pinch of each basil, thyme, oregano, rosemary)
  • pinch salt & pepper

Note* If you do not have all of the seasonings above, it is ok the seasoned bread crumbs make up for it. 

What to do:

Preheat the oven to 350º

Whisk the egg and mayonnaise together

SAMSUNG CSC


Add the remaining ingredients and mix well ,  use a fork or your hands

SAMSUNG CSC


Drizzle a cookie sheet with olive oil, roll mixture into 2-3 inch meatballs.

Place on the cookie sheet and bake for about 15-20 minutes.

Easy Restaurant Style Italian Chicken Meatballs


You want to make sure to cook these all the way through since it is chicken. Do not be afraid to cut one right in half to check if you don’t have a meat thermometer.

Enjoy!

SAMSUNG CSC

EASY RESTAURANT STYLE ITALIAN CHICKEN MEATBALLS