Simple Homemade Blueberry Muffins

Simple Homemade Blueberry Muffins

I use to be so scared to bake anything. I was no good at it. Then I decided to skip being scared and just practice. Baking is hard for me because I tend to “eyeball” or “judge” on the amount of an ingredient. With baking you can not do this.  Baking is literally science, not just “a science” like the saying.  If you are off on one ingredient, another ingredient may not do what it is suppose to. So, don’t be scared to bake, just make sure you follow the recipe exactly. Start with something simple like this easy blueberry muffin recipe.

Remember: 

  • Always follow baking recipes EXACTLY
  • Always use real unsalted butter when a recipe calls for “butter or margarine” .   Trust me, it makes a difference.

Simple Homemade Blueberry Muffins


Ingredients
  1. 1 cup warm milk
  2. 1/2 cup Land O Lakes® Butter, melted
  3. 1 Land O Lakes® Egg, slightly beaten
  4. 2 cups all-purpose flour
  5. 1/2 cup sugar
  6. 2 teaspoons baking powder
  7. 1/2 teaspoon salt
  8. 1 cup fresh or frozen blueberries
  9. Topping
  10. 1/4 cup Land O Lakes® Butter, melted
  11. 1/4 cup sugar
Instructions
  1. Heat oven to 375°F.
  2. Grease a muffin tin or line with baking cups.
  3. Mix milk, 1/2 cup melted butter and egg in medium sized bowl.
  4. Add all remaining ingredients except blueberries; mix.
  5. Then fold in the blueberries. TIP* I use small wild Maine blueberries from Wyman’s. Use can find these in your freezer section. No need to defrost. Just add to a bowl, coat with 2 tablespoons of sugar before adding to muffin batter.
  6. Spoon batter evenly into prepared muffin pan cups.
  7. Bake 22-26 minutes or until golden brown.
  8. Cool slightly; remove from pan.
  9. Brush muffins with 1/4 cup melted butter, then in sugar. Optional.

 

Bacon & Cheese Stuffed Sweet Peppers

Bacon & Cheese Stuffed Sweet Peppers

I see these cute, colorful little peppers in the grocery store all the time and I just have to buy them. Like a green bell pepper, they are sweet, crisp and crunchy.  I snack on raw as well as use for cooking.

Bacon & Cheese Stuffed Sweet Peppers


One of my favorite dishes to make is stuffed peppers. Normally I make them traditional with rice, ground beef and sauce.  This time we wanted to try something different. These bacon & cheese stuffed sweet peppers were a huge hit, even the kids liked them. They usually won’t eat the traditional stuffed peppers!

These little guys make a perfect appetizer, lunch or side to a big Italian meal!

Bacon & Cheese Stuffed Sweet Peppers


Ingredients
  1. 8 Small Sweet Peppers
  2. 1 Cup of Ricotta Cheese
  3. 1/2 Cup cooked crispy bacon, crumbled
  4. 1/2 Cup shredded mozzarella cheese
  5. 2 tablespoons grated parmesan cheese (shaker cheese is fine!)
  6. 1 Medium egg (if you only have large eggs whisk it up and only pour half the egg into the ricotta)
  7. 1 teaspoon Italian blend seasoning ( or a pinch each of rosemary, thyme, oregano, basil)
  8. 1 small clove of garlic minced, or a pinch of garlic powder
  9. Olive oil
  10. pinch of salt & pepper
Instructions
  1. Preheat the oven to 400
  2. Cut the tops of the peppers, remove the ribs & seeds
  3. In a medium bowl, beat (by hand) the egg into the ricotta
  4. Add the mozzarella, parmesan, bacon, seasonings and garlic, Mix.
  5. Spoon the mixture into each pepper
  6. Lay them on a cookie sheet that has been drizzled with olive oil
  7. salt & pepper
  8. Roast on 400 for about 15 minutes
  9. Cook time may vary

3 Must Have Kitchen Conversion Charts

main conv pic smaller

3 Must Have Kitchen Conversion Charts

The following conversion charts will be your most important tool in the kitchen, well besides your stove. You may or may not think you will need them,  but trust me…  print them. save them. bookmark them.  Do what you have to do, because once you have them you WILL use them.  I created these from convenient magnet charts I made a long time ago.

If you would like a collaged printable version or any edits to make it easier for you to print,  please use the contact form to send me an email.  I can edit these to fit on one page and even remove some color to save on ink!   OR just bookmark and come back any time you need them.

Click to enlarge image

Conversion Chart: Basic conversions that will come in handy if you are limited on measuring cups or spoons. Also if you need to convert to fluid oz. or milliliters. I use this chart a lot more than I ever expected I would.

Cup to Tablespoon Conversion Chart

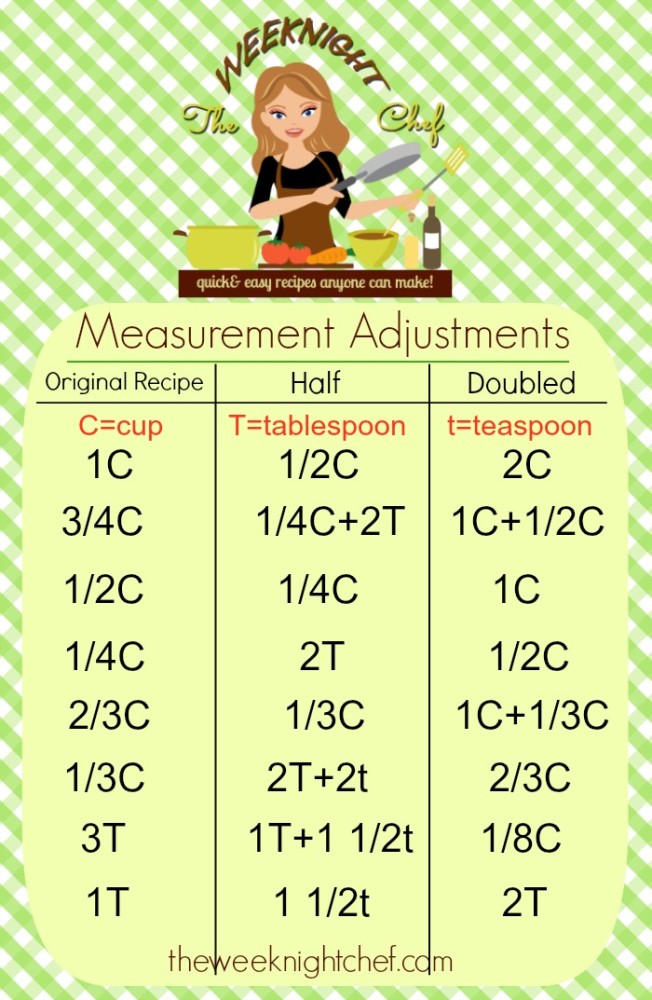
Measurement Adjustments:  Got a recipe you need to cut in half or double?  Doing math while trying to cook can be overwhelming … who wants to do math when they are cooking? You just end up doubting yourself, adding more or less than you need and then screwing up your recipe.  Follow this chart-  it is 100% easier.


Measurement Adjustments - Half or Double a Recipe


Egg equivalents:  have a recipe that calls for 3 large eggs?  Only have small eggs on hand? Easy enough… just take a peek at this chart to know what you need.


Egg Size Equivalents

20 Minutes One Pan- Easy Skillet Lasagna

SAMSUNG CSC

20 Minutes One Pan- Easy Skillet Lasagna

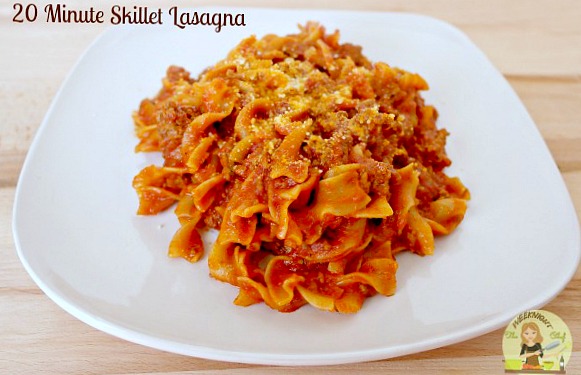
Gone are the days when lasagna was reserved for a Sunday dinner or special occasion. What use to take over an hour to do and cost around $20 has been simplified into a delicious dish that can be made in 20 minutes for around $8. The best part is that there is no need to boil the noodles or use multiple pots and pans. This lasagna is made in one skillet!

What you need: 

1lb ground beef
12 oz. mafalda noodles (looks like mini lasagna!) or medium egg noodles
1 jar of your favorite pasta sauce
6 oz. ricotta cheese
1/4 cup parmesan cheese

What to do:

Brown the ground beef, drain the fat, return to medium low heat.

Add the sauce and noodles, increase heat to medium high and cook for 10 minutes.  Stir occasionally.

SAMSUNG CSC

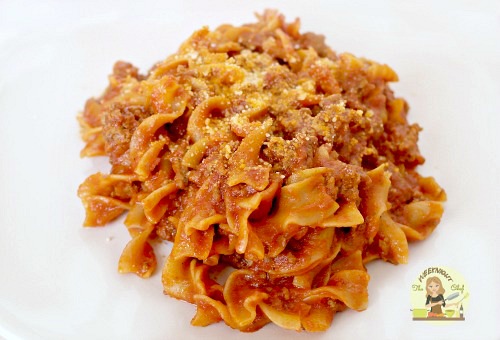
Reduce heat to medium low, add the ricotta cheese , gently mix in, do not mix completely. You don’t want it to blend away into the sauce.  Let simmer for 5 minutes.

Plate, sprinkle with parmesan, serves 4.

SAMSUNG CSC


20 Minute Skillet Lasagna


Holiday Cooking Tips- Top 10 Time Savers

cookingtipspin

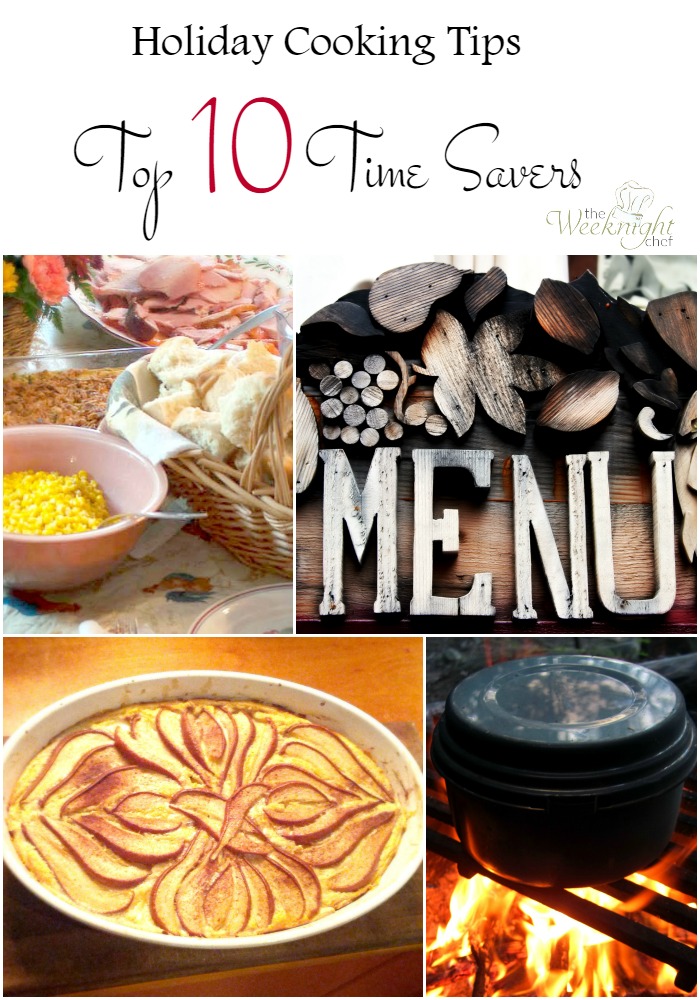
Holiday Cooking Tips- Top 10 Time Savers

If you have hosted a Thanksgiving dinner you know how stressful it can be.  The pressure of trying to get everything cooked and served hot at the same time is crazy.  This could be the reason so much wine is had before noon ,  joking.  Well, maybe !  Over the years, I have managed to figure out a process that works by using some great time savings tips I learned long ago.

These tips are great whether you are hosting a dinner for the first time or you have been doing it for years. The best part is that they can be applied to every type of dinner from a large holiday to a busy work night meal.  Try them out and let us know if they helped!

1. Plan ahead, menus are not just for restaurants! –   Create a menu that includes the name of the dish, how long it takes to prepare, how long to cook and put them in order of how you need to make them.  For example, appetizers, main dish, dessert.  Add side notes such as “Make the day before” ,  “Freeze, thaw that morning”.

2. Make one shopping trip–  Make a list,  check it twice, or three times.  Whatever you do, make sure everything is on it and you buy everything. You do not want to have to buy anything last minute.  Does anyone remember that episode of The Cosby Show where he had to go out in the rain, more than once.  Don’t let that be you….    (Ps. Yes, I referenced Bill Cosby, the fact that he has issues going on right now doesn’t make the episode any less funny)
3. Use ingredients more than once–  One of the most time consuming part of cooking is the preparation. Try to use ingredients more than once, this way you can prep once, use twice.  For example, if your making mashed potatoes you can also make a roasted potato with green beans. When you dice your potatoes, reserve some for the roasted dish.
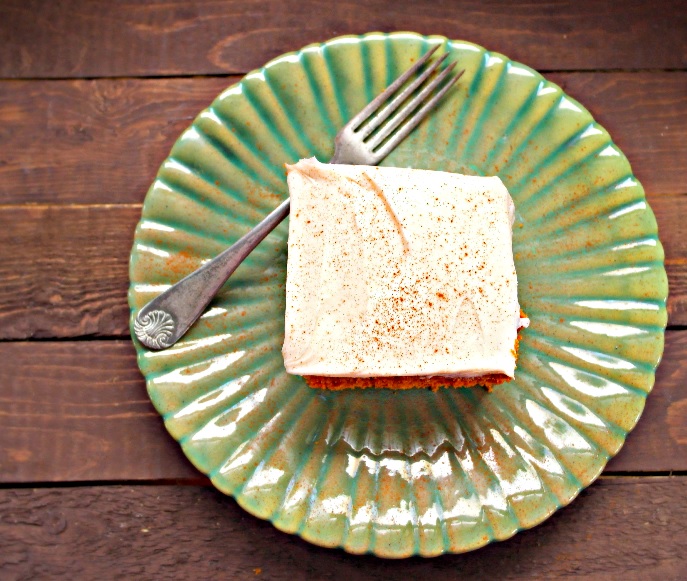
4. Don’t be afraid to “Semi-Homemake” it –  Semi-homemade recipes are my absolutely favorite. They save a lot of time in the kitchen and still present an amazing dish. For example,  skip the scratch pumpkin cake and use a box spice cake. Add a little pumpkin and make your own frosting. I have personally done this one and it was a huge hit !

5. Use frozen vegetables–  If your recipe allows, use frozen vegetables. They are the closest thing to fresh without all the added preparation like cleaning, de-seeding, chopping. I love homemade creamed corn, but I can not always get corn on the cob (or have time to husk it, roast and cut it off the cob).  So instead, I use frozen corn, toss it in a skillet with a little olive oil, salt & pepper, give it a little color. The flavors come out and you would never know it was frozen.
6. Delegate duties–  As hard as it can be to cook in the kitchen with other people, it can also be pretty helpful. Sometimes you just have to go against everything you have always said about being the only person to cook in your kitchen…   oh, wait.. that was me. I said that. I don’t like to share my kitchen, but I will share tasks!  Hand your husband a knife, some vegetables and a cutting board and send him to the kitchen table to help prep.  Or better yet,  keep your child on hand to clear away and clean dirty dishes as you make them. Even a home cook needs a “sous chef”  and “bus boy”.
 7. Make ahead – choose recipes that can be made ahead of time and frozen. Such as dinner rolls. A yeast dough can be , stored in the freezer and taken out the day before hand. Let it thaw, cut into pieces, place in your baking dish of choice and let proof the morning of your dinner then bake about 30 minutes before serving.  Pies…  pies are the perfect make ahead dessert!


 8. Enlist your slow cooker– The slow cooker is great for so many different things. Make appetizers, hot drinks, side dishes, even desserts.  The best part, you can keep it warm all day long. Ok, the best part really is that you just toss the ingredients in and do a whole “set it and forget it” thing.  Try a meatball appetizer or the chocolate lava cake I have been seeing around social media!
9. Set up a bar– Not necessarily an alcohol bar, but maybe a hot chocolate bar or self serve appetizer bar.  Make a punch, set out crackers, cheese, pickles, olives, fruit and veggie trays. This is a great way to skip making all those hot appetizers. A fun idea for the kids- use your Crockpot to make hot chocolate, sit it out with cups and a selection of mix-ins and toppings like marshmallows, chocolate syrup, chocolate chips, whip cream and peppermints.

10. Use your grill or alternate heat source–  A turkey or ham can take up a lot of room in the oven, sometimes all of it. One year I cooked a 28lb turkey, I had to remove the top rack, nothing else was going in the oven.  Grills have side burners, boil your potatoes on it. Just be sure to delegate the duty of watchman to someone. You do not need to be running in and outside.


12 Delicious Thanksgiving Side Dish Recipes

12 Delicious Thanksgiving Side Dish Recipes

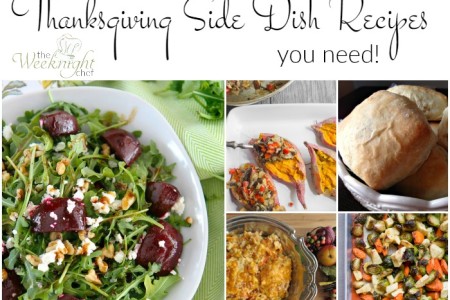
I love using Pinterest to find recipes around the holidays, but they can be hard to sift through and choose from.  So for your Thanksgiving Side Dishes, I did it for you.  I have included all the traditional types of side dishes. You will notice, however that they are absolutely not basic by any means. Each recipe has taken a traditional side dish and elevated it to a gourmet, restaurant style dish.  There is a mashed potato appetizer, green salad, squash, stuffing, stuffed mushroom, roasted potato, rolls and more!

The best part,  No Repeats.  You could make all of these for Thanksgiving and your guests would be raving about your spread! Enjoy

Garlic Herb Roasted Potatoes & Green Beans 

Easy Crockpot Cranberry Sauce (Make ahead!)

Crockpot Squash Casserole 

Portabella Stuffed Sweet Potatoes

Sausage Garlic And Quinoa Stuffed Mushrooms

Balsamic Beet Salad with Arugula, Goat Cheese & Walnuts

Rosemary Roasted Brussel Sprouts, Carrots, Parsnips

Harvest Apple Cranberry & Sage Sausage Stuffing 

Kale Salad with Apples, Craisins and Feta Cheese

Quick Dinner Rolls

Angel Biscuits 

Phyllo Potato Bites 

Pin and Save For Later !

sidedishpin


Old Fashioned Sugar Cookies With Peppermint Icing

Old Fashioned Sugar Cookies with Peppermint Icing Recipe

Cookies, cookies and more cookies!  If you can’t tell it is the holiday season by all the shopping commercials, you can by the internet.  Every social media outlet is talking about holiday cookies.  Filled cookies, pressed cookies, rolled cookies, thumbprint cookies, chocolate, caramel, fig, you get my point.

So how can a sugar cookie compare?  By being traditional! A simple old fashioned sugar cookie is my favorite.  A spoon drop batter that bakes up light and fluffy with a slight crunch to the edges. I do enjoy them plain, but occasionally I kick it up a notch with an icing.  A peppermint icing!   Try them out and tell us what you think.

Don’t forget to Pin this to your favorite board!

Old Fashioned Sugar Cookies with Peppermint Icing Dough

Old Fashioned Sugar Cookies With Peppermint Icing

Ingredients
  1. 2 sticks softened butter
  2. 2 large eggs
  3. 1 3/4 cups white sugar
  4. 1/4 cup packed brown sugar
  5. 1 teaspoon vanilla
  6. 2 3/4 cups all-purpose flour
  7. 1 teaspoon baking soda
  8. 1/4 teaspoon salt
For the icing
  1. 1 cup powdered sugar
  2. 1 tablespoon milk
  3. 1/2 teaspoon peppermint extract
Instructions
  1. Preheat the oven to 375
  2. In a large bowl, using an electric mixer beat butter, sugar, eggs and vanilla until smooth.
  3. Fold in the flour, baking soda and salt.
  4. Lightly roll cookie dough into 2 inch balls and place on cookie sheet.
  5. Bake for 6-8 minutes or until golden brown. Cool on a rack.
For the icing
  1. Mix all icing ingredients in a small bowl until smooth.
  2. Icing can be spread on with a spatula or piped on with a pastry bag.
Notes
  1. NOTE* I am not a professional baker, I like to save time and dishes. I never use two bowls and have never had an issue with the result of my baked goods. I evenly distribute the flour over the top of the wet ingredients, then sprinkle the leavening agent and salt over the top and fold in. This is just my way and it works, use your own judgement.

Old Fashioned Sugar Cookies with Peppermint Icing Recipe

The Only Gingerbread Recipe You Will Ever Need

PumpkinKeepFG

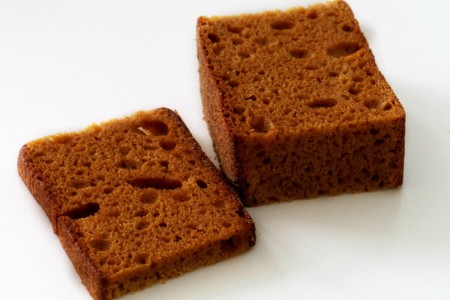
There are a lot of recipes out there for gingerbread, but this one takes it over the top!  Not only is it easy, but it packs a punch. The flavor of ginger actually comes through. This recipe is also easier because it is made in one bowl.  Yes, one. No extra dirty dishes. Simply beat the wet ingredients then add the dry ingredients right on top.  The recipe has been tested again and again,  and the one bowl method still holds true!

We hope you enjoy.

Totally Ginger Gingerbread

The Only Gingerbread Recipe You Will Ever Need


Ingredients
  1. 1/2 Cup Brown Sugar, Packed
  2. 1/2 Cup Butter
  3. 1 Large Egg
  4. 1 Cup Molasses
  5. 1/2 Teaspoon Vanilla
  6. 2 1/2 Cups All Purpose Flour
  7. 1 1/2 Teaspoons Baking Powder
  8. 1 Teaspoon Cinnamon
  9. 2 Teaspoons Ginger
  10. 1/2 Teaspoon All Spice
  11. 1/2 Teaspoon Salt
  12. 1 Cup Warm Milk
Instructions
  1. Preheat the oven to 350
  2. In a large bowl, beat the sugar, butter, molasses, egg and vanilla until smooth
  3. Sprinkle flour evenly around on top of the butter sugar mixture
  4. Do the same for the remaining dry ingredients
  5. Mix until all ingredients are combined
  6. Stir in the warm milk
  7. Pour batter into a greased 9×9 square pan
  8. Bake for 40 minutes or until a toothpick inserted in the middle comes out clean
Notes
  1. If you would like to use a 13×9 pan, reduce the cooking time by half to start with. Your cake will be a bit thinner but great for layering!


GingerbreadPin


Chocolate Mint Grasshopper Brownie Bites

Grasshopper Brownie Bites Recipe

Chocolate and mint…   a classic, all time favorite of mine.  And of many others,  I am certain of it! I have made grasshopper cookie sandwiches quite a few times in the past, but this time I decided to try something different. Although they aren’t totally different,  it still was something new and besides, I was being lazy and did not feel like whipping up the batch of homemade cookies.  Instead I spruced up a boxed brownie!

You can get away with using boxed mixes if you create at least one element homemade, no one will ever know! Shhhh.  Try them out, Let us know what you think !

Chocolate Mint Grasshopper Brownie Bites

Ingredients
  1. 1 Box Brownie Mix, prepared
  2. 1/3 cup flour
  3. 1/2 cup mini chocolate chips
For the frosting
  1. 1/4 teaspoon peppermint extract
  2. 1 tablespoons butter
  3. 1 cup powdered sugar
Instructions
  1. Preheat the oven to 350
  2. Mix the flour into the prepared brownie batter, this will thicken it up making it easy to spoon onto cookie sheets.
  3. Drop spoonfuls, about 2 inches apart and bake for 8-10 minutes
  4. Allow to cool completely.
Mix the frosting
  1. Cream the butter (using a hand mixer) until smooth, add the peppermint extract and fold in the powdered sugar.
  2. Use the hand mixer to whip until all the powdered sugar is incorporated.
  3. Spread a small amount of frosting on the the brownies and sandwich them together.
  4. Refrigerate for about 10 minutes to set up.
Notes
  1. These freeze really well, make them ahead of time or make a double batch and freeze!

grasshopper brownies